一、服务端(192.168.8.81):
- 安装软件:
yum -y install rsync - 创建需同步的目录:
mkdir -p /home/lee/rsync - 编辑配置文件:vi /etc/rsyncd.conf
motd file = /etc/rsyncd.motd transfer logging = yes log file = /var/log/rsyncd.log #port = 873 #启动失败可去掉 #address = 192.168.8.81 #启动失败可去掉 uid = root gid = root use chroot = no read only = no max connections = 10 [common] comment = rsync lee path = /home/lee/rsync/ ignore errors auth users = lee secrets file = /etc/rsyncd.secrets hosts allow = 192.168.8.0/255.255.255.0 hosts deny = * list = false - 创建用户密码(注意权限为600):
echo "lee:123456" > /etc/rsyncd.secrets chmod 600 /etc/rsyncd.secrets - 创建提示信息文件:
echo "rsync lee" > /etc/rsyncd.motd - 配置防火墙规则:
iptables -I INPUT -p tcp --dport 873 -j ACCEPT - 启动服务:
rsync  --daemon
echo  "rsync  --daemon"  >>  /etc/rc.local
二、客户端(192.168.8.82):
- 安装软件:
yum -y install rsync - 创建需同步的目录:
mkdir -p /home/lee/rsync - 创建密码文件(免输入密码)(注意权限为600):
echo "123456" > /etc/rsync.passwd chmod 600 /etc/rsync.passwd - 拉取:
rsync -avz --password-file=/etc/rsync.passwd lee@192.168.8.81::common /home/lee/rsync/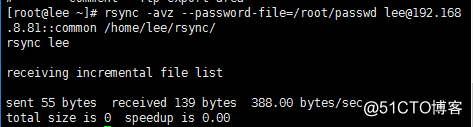
- 推送:
rsync -avz --password-file=/etc/rsync.passwd /home/lee/rsync/ lee@192.168.8.81::common
转载请注明:清韵逸-博客生活分享 » CentOS 7安装部署Rsync数据同步服务器